Maserati - Task 6
Mount the push button to the steering wheel
Note that this is only required for cars that will be operated by hand.
Procedure
- Locate the steering wheel that came with the car
- Remove the 11 screws that hold the steering wheel cover to the steering wheel base and save the screws in the magnetic bin. There are 7 screws around the ring and 4 in the center hub.
- Separate the front ring from the back part of the steering wheel. The two parts should look like those in the photo.
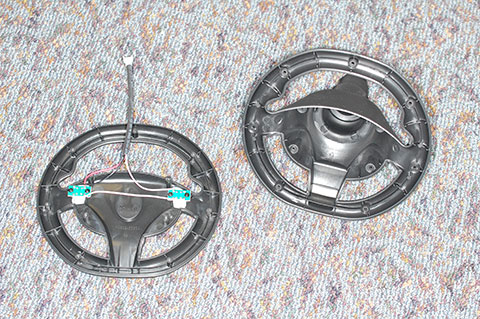
The left is the rear view of the steering wheel cover. The right is the rear part of the steering wheel. - Locate the large, red push button and:
- Remove the switch from the bottom of the button by rotating it 1/8 turn counter-clockwise, and then pulling.
- Set the switch in a safe location for later use.
- Remove the white nut.
- Be careful to keep the switch base ring together with the red push button.
- Use a flat-tip screwdriver to remove the Maserati emblem that is stuck to the steering wheel cover.
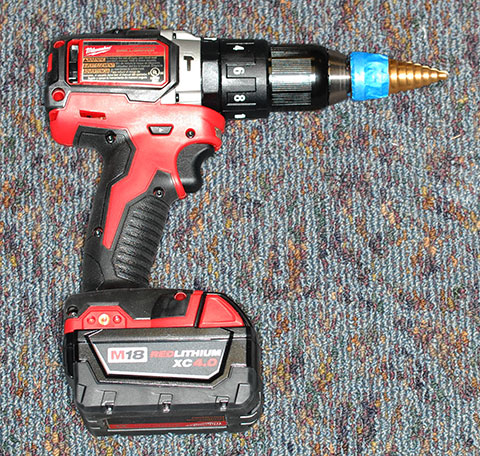
- On the large step-drill bit, locate the 1” diameter step and mark it with blue masking tape.
- Mount the large step-drill bit in the drill. The drill and bit should look like the photo.
- Position the steering wheel cover such that there is nothing below the emblem recess in the steering wheel cover so that you can drill through it safely.
- In the center of the emblem recess on the steering wheel cover:
- Use the drill to make a 1” diameter hole.
- Test the hole size by inserting the threaded part of the push button. When the threaded part of the red push button can pass through the hole, you are finished drilling.
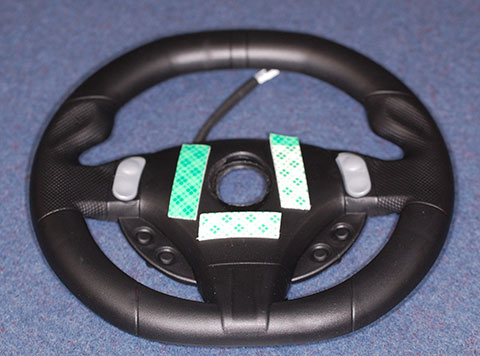
- On the face of the steering wheel cover, apply three (3) pieces of double-sided foam tape in a square around the 1” hole.
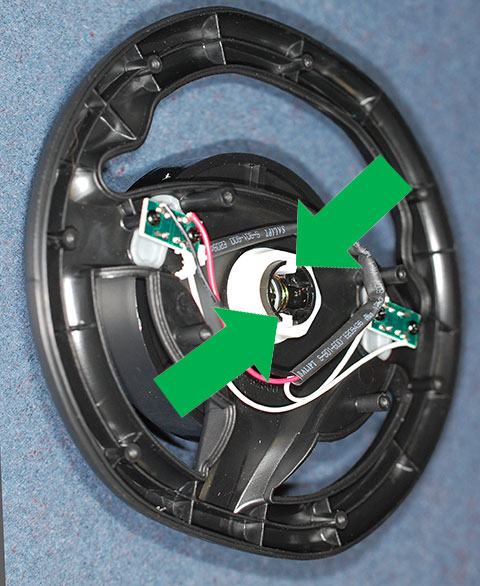
- Remove the protective film from the double-sided foam tape and insert the push button and base through the 1” hole. Make sure that the white tabs (indicated by the green arrows) are vertically aligned with the center steering wheel spoke.
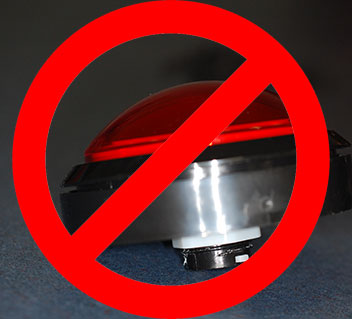
- Make sure that the push button base is aligned correctly with the push button. Make sure that the button fits completely into the base. There should be no space between the ring around the red button and the base when completely assembled.
The photo shows an example of a button that is not correctly seated in the ring.
- When the push button base and the white tabs are properly aligned, tighten the white nut.
Verification
Confirm the button is correctly mounted in the ring and the white tabs on the back are aligned with the center spoke in the steering wheel cover.

After you confirm that the white tabs are aligned and extend above the white nut, you can continue to the next task.