Maserati - Task 11
Install the toggle switch assembly.
This task is easier with two people.
Make sure that the battery has been disconnected before performing this step
Procedure
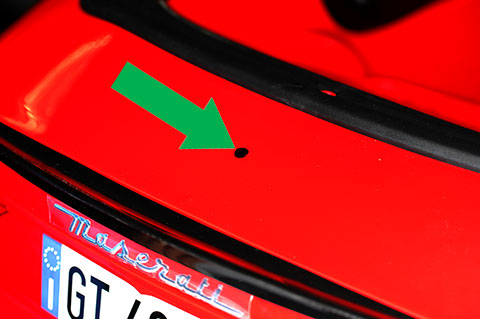
- With the car on its wheels, locate the center of the rear deck lid of the car and mark it with a marker. This point should be midway between the black spoiler and the black trim behind the seat and midway between the car’s rear fenders.
- Mount the smaller step-drill bit in the drill in the drill.
- Use the drill and step-drill bit to make a 1/2” hole at the location marked in step 1.
- Remove the step-drill bit and mount a 1/4” bit.
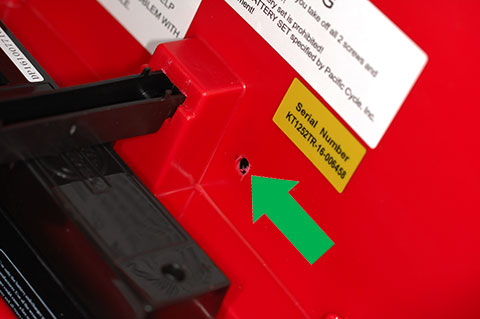
- In the rear of the battery compartment, above the battery, next to the battery hold-down bar, and on the side of the battery that does not have the battery wires, drill one 1/4” hole.
- Remove the 1/4” bit and mount a 1/8” bit.
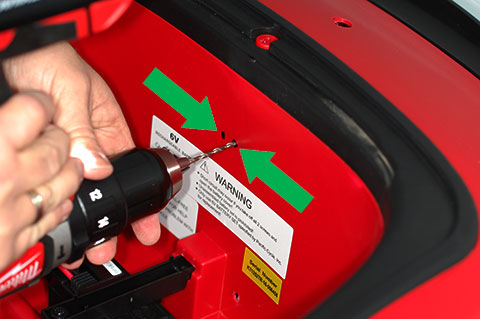
- In the rear of the battery compartment, midway between the battery hold-down bar and the top of the battery compartment, drill two 1/8” holes, 3/4” apart so that they are next to each other horizontally.
- Insert the free end of the 22” duplex wire from the switch through the 1/4” hole so that the free end is in the battery compartment.
- Remove the nuts and ON/OFF label from the toggle switch.
- From beneath the car, insert the toggle switch through the hole in the rear deck lid. Align the toggle switch so that notch in the threads is facing the right rear fender.
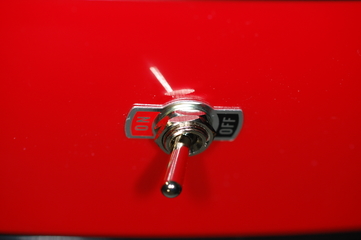
- The ON side of the switch should be on the left side of the switch as pictured below.
- While holding the switch in place, place the ON/OFF label on the switch’s threads and tighten each nut to hold the switch and label in place.
If there’s no metal label, apply the Off/Go (or On) labels.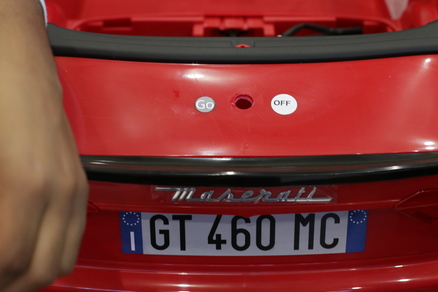
Then, cover them with tape.

- From the battery compartment, insert a wire tie through one of the 1/8” holes, wrap around the 22” duplex wire and pass it through the other 1/8” hole to secure the 22” duplex wire.
- Secure the wire tie to hold the 22” duplex wire to the car.
The photo shows how this should look from under the car after this step is complete.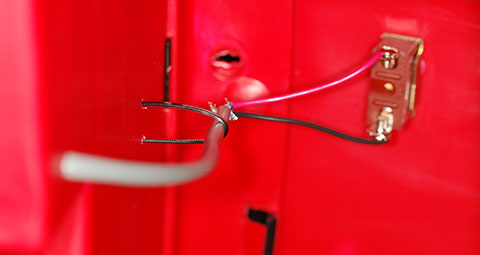
Verification
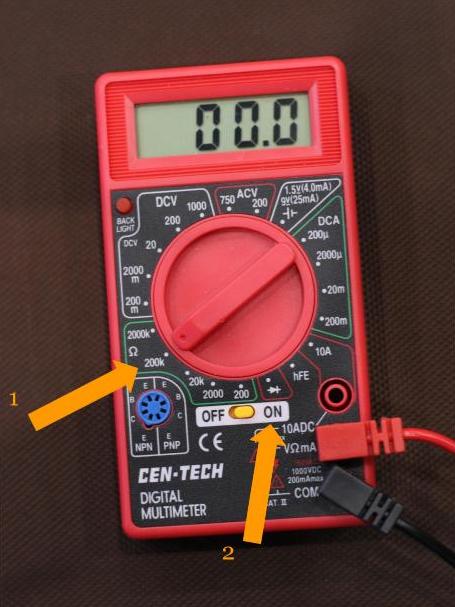
Use the multimeter to test the wiring.
Short video on using the multimeter to measure continuity
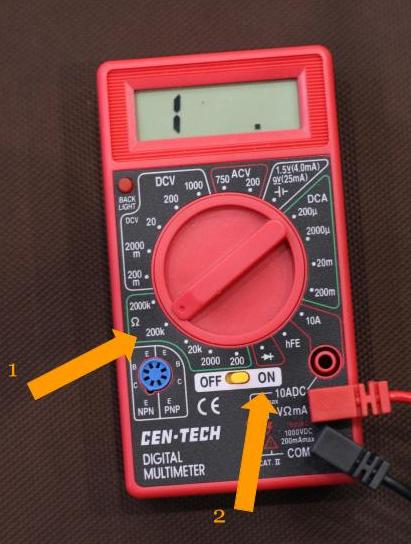
- On the multimeter, select “Ohms” (or continuity). This is usually indicated by the Greek letter omega (Ω) for Ohms.
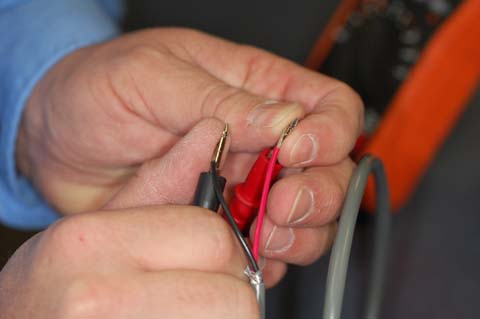
- At the end of the 22” 18-ga duplex wire that’s not connected to the switch:
- Place the red lead of the meter on the bare wire of the red wire.
- Place the black lead of the meter on the bare wire of the black wire.
- With both leads touching their respective wires as shown in this photo
- With the switch in the OFF position, the meter should not show continuity.
- With the switch in the ON position, the meter should indicate continuity (by showing zero or almost zero ohms or beeping).

- With the switch in the OFF position, the meter should not show continuity.
After you confirm that toggle switch is wired correctly, you can continue to the next task.